

Balancing Ambient Light With Flash
Balancing ambient light with flash can be a little tricky at first. However, it really isn’t nearly as hard as you would think. One of the most common mistakes I see photographers make is trying to tackle everything at once when they are first trying to balance light. I have found it is much easier to take things step by step. Whenever I am trying to light something or someone, I always get my base ambient exposure first. From there I add flash until my subject looks properly exposed. If you haven’t read our E-Book on OCF you can download it for Free Here. You need to understand how Aperture, Shutter Speed, and ISO affect Flash to fully understand this article. Lets look a little further into how this works.
Tip 1. Have An Idea Of What Aperture You Want To Shoot At.
Whenever we light our subject we are thinking first, about what aperture we want to shoot the image at. It is also important to note that we use our speedlights in manual mode 100% of the time. This allows us to have complete control over the light but also limits our shutter speed. When using manual flash we are limited by our camera’s sync speed. (Sync speed is the fastest shutter speed for which both the front and rear curtain are completely open when the flash fires.) Keeping this in mind, we set our shutter speed at 1/100th. This gives us room to raise the shutter to darken the ambient a little more or lower the shutter speed to let in a little more ambient. This way of breaking everything down helps tremendously to simplify everything. At this point we know we want to shoot around f3.5 (just our preference for the scene) and we know we want to start with our shutter at 1/100th. From here we just need to raise our ISO until the ambient light is slightly underexposed.
Tip 2. Find Your Ambient Exposure First. (Expose for the background)
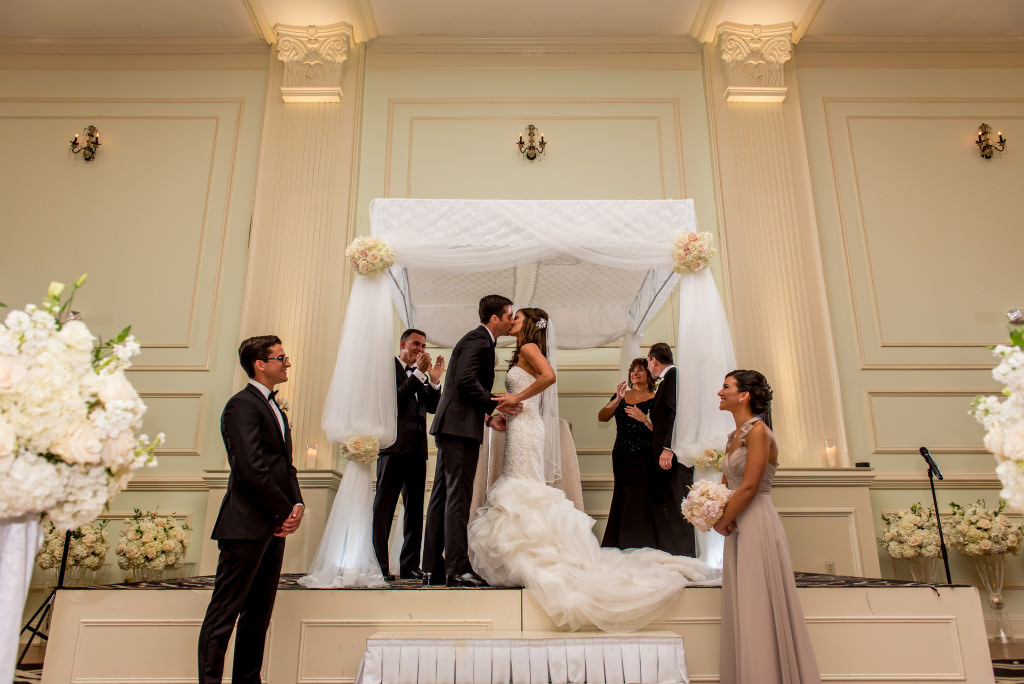
The setting I am working with is an indoor reception as you can see. I had my assistant stand where the B&G would be standing so I could start getting my ambient exposure. In the image below i exposed for the brightest part of the scene. The lights in the Chuppah were way brighter than the rest of the scene. If I exposed for my assistants face i would blow out the lights in the Chuppah. As you can see, exposing for the brightest part of the scene ends up underexposing my subjects face. This is exactly what we want to happen though. I found the proper ambient exposure to be ISO500, 1/100th, f3.5. This is the most important step when balancing ambient light with flash.
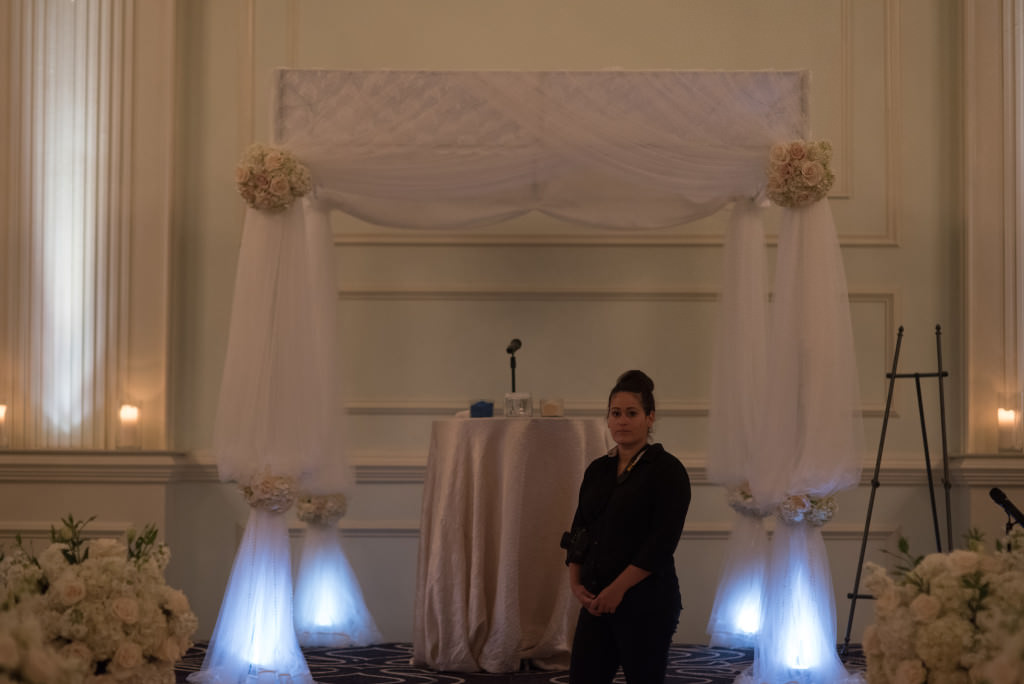
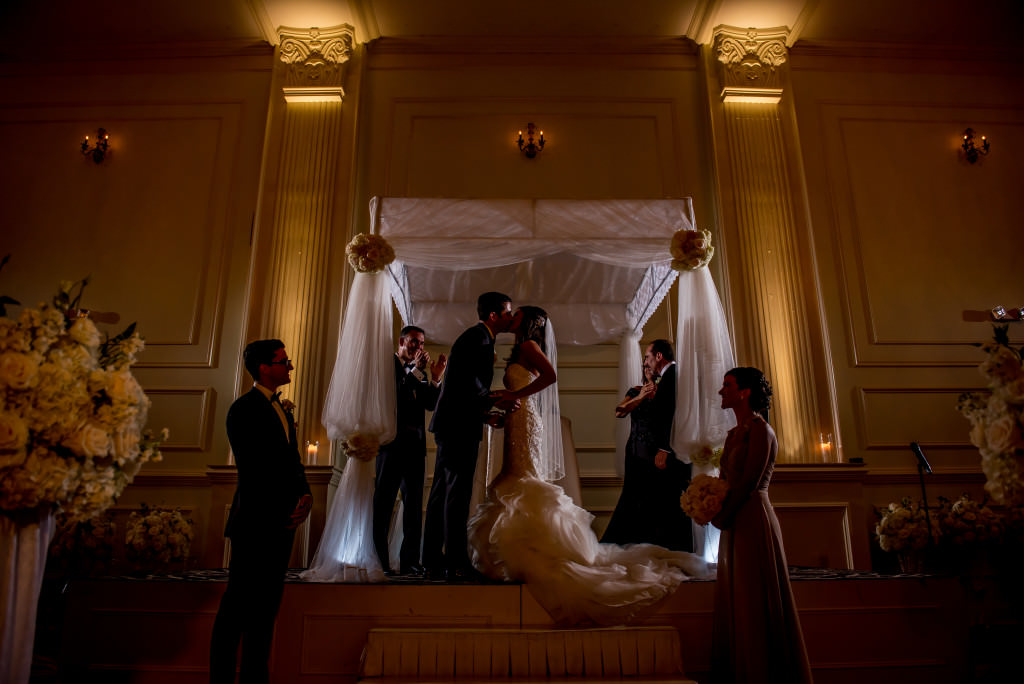
Now that we have our ambient exposure its time to add flash! In the image below you can see two stands with speedlights on them. My speedlight is the one that is firing. The other one is the other shooters flash. I have one speedlight on either side of the Chuppah with a Mag Grip and Mag Grid From MagMod on them. (Magmod is our favorite speedlight modifier system) The grid focuses the light on the Chuppah rather than blasting it everywhere. The lights are placed slightly behind where the B&G will be standing and just above eye level.
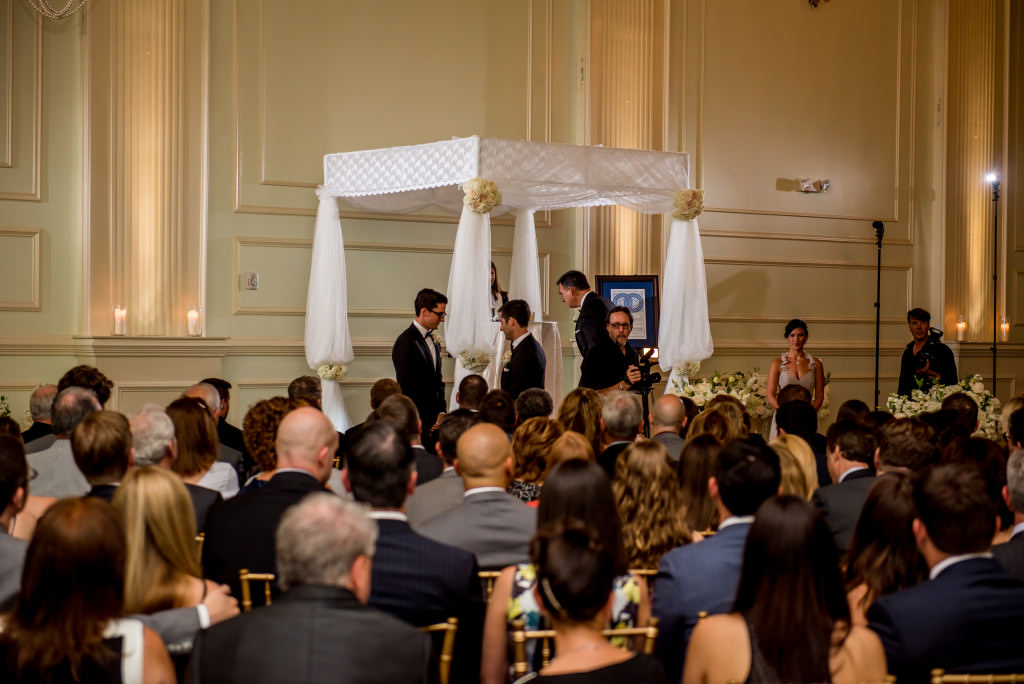
Now I just power up my speedlights until they light my subject properly. In the image below, I am firing both speedlights. When I did this I realized that I would benefit from adding a little bit of fill light from my camera. I added a speedlight on camera and aimed the flash head straight up in the air. I then pulled the bounce card out just slightly to throw some light onto my subject. I choose this method because the ceilings were super high and bouncing the light off it wasn’t really an option. After a few adjustments of the light position we were able to evenly light the scene.
Tip 3. Proper White Balance – Gel Your Flash/Adjust your Kelvin
You can see from the image below that the light that comes out of a speedlight is more blue than the available ambient. In order to make sure the colors of our image stay consistent, we can put a CTO gel over our speedlights. This will warm up the color temperature of the flash to be closer to the more orange look of the ambient light. From here we can adjust our Kelvin settings until the entire scene looks good color wise.
Conclusion
So there you have it! Balancing ambient light isn’t really all that tough. Remember, when you are first trying to get this figured out, tackle one thing at a time. Think the process out in your head. Figure out what aperture you want to shoot at and then build everything else around that. If you want to learn more about Lighting check out our FREE Beginner’s Guide to OCF.
Camera Nikon D750
Speedlights Yongnuo 560III
Trigger Yongnuo 560-tx
Lens Nikon 24-70mm f2.8
Join our community on Facebook called The Art of the Second Shot.
Follow me on Instagram
Follow me on Twitter
Comments are closed.