

Intro
One of the things we get asked all the time is how we create the reflection shots. Utilizing reflections has become a big part of our creative process on a wedding day. They can be found everywhere if you take a step back a take in your surroundings. We will explain how we achieved the ambient settings, light placement, creative thought process, etc.
{Balancing Ambient Light With Flash}
Creative Thought Process
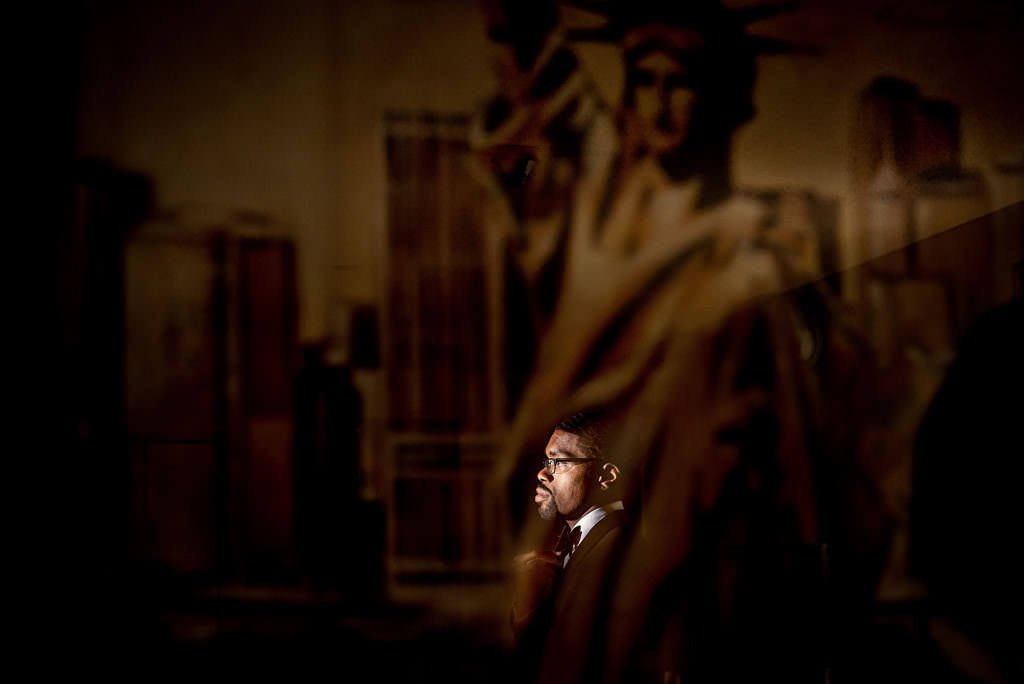
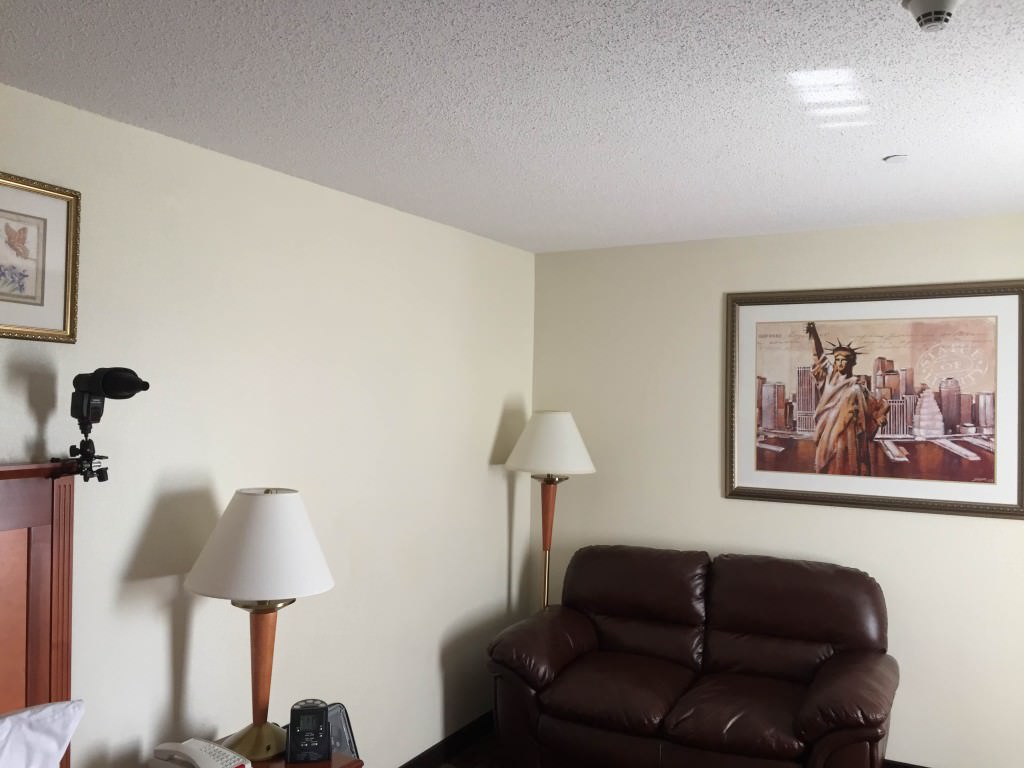
This As you can see from the image above, the hotel room I was working with isn’t anything crazy. It was relatively uncluttered but didn’t have a ton of appeal in and of itself. Our couple was getting married in North Jersey and having their reception at The Waterside Restaurant which was right on the Hudson River. There was a beautiful view of the NYC skyline from their venue. NYC had played a big part of bringing them together and it was a big part of their life. I wanted to incorporate their love for NYC into the groom’s prep somehow. When I first walked into the room I saw the picture on the wall of the Statue of Liberty and thought it would be perfect to use somehow. I just needed to figure out how to incorporate the groom into the image. We are always utilizing reflections to tie in interesting aspects into the image that wouldn’t normally be there. For more on how we do this check out our article on SLR Lounge called Using Reflections to Create the Illusion of a Double Exposure.
Utilizing Reflections
Below you can see the setup and light placement. Lets pretend the Blue backdrop is the picture hanging on the wall. In order for the groom to show up in the reflection I knew I would need to light him so that he would pop. In order to add flash to the groom I first needed to under expose the ambient (available) light essentially creating a dark background to shoot into. I positioned the groom behind me because that happened to be the right distance I needed him to be from the painting to fit in the composition correctly.

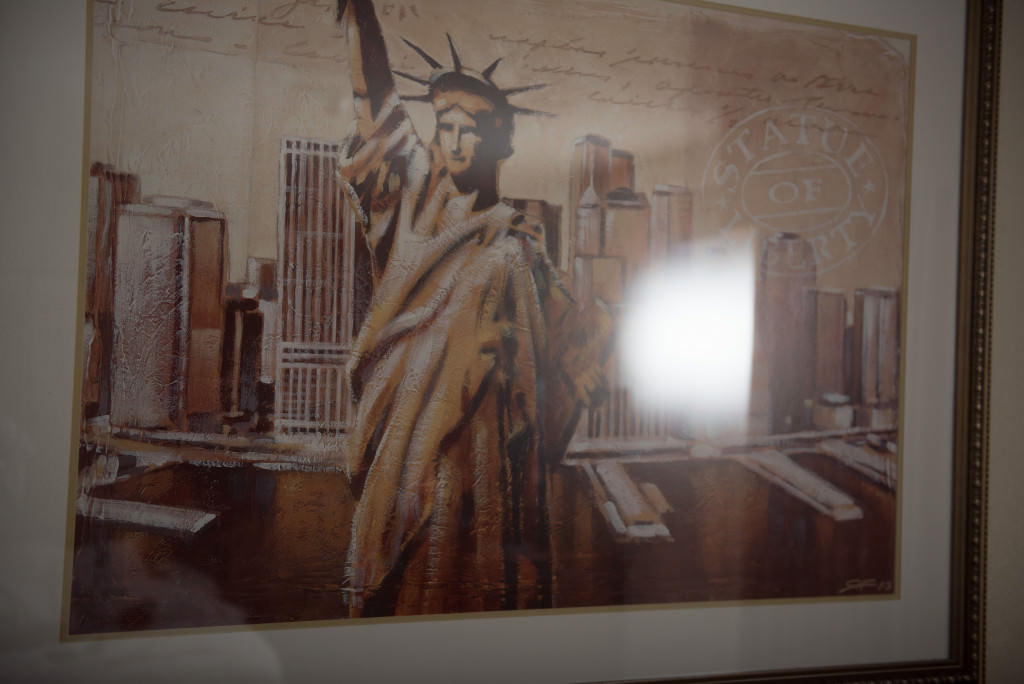
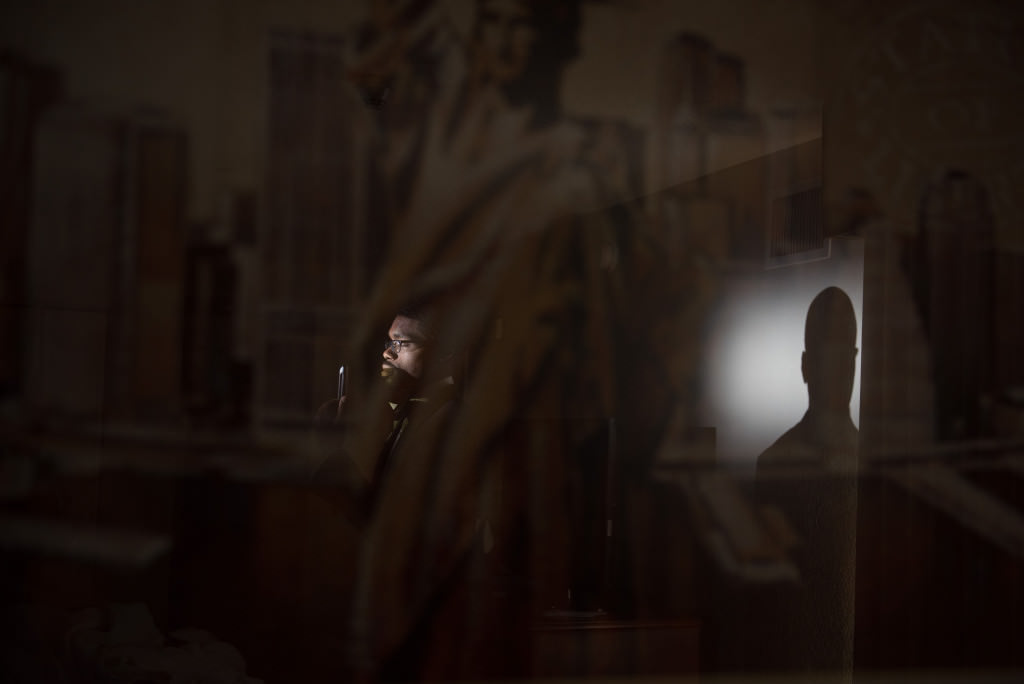
In the image below the groom is standing where I put him but you can’t see him in the reflection because the background is brighter than he is.
I closed the curtains and turned off all the lights and then I couldn’t focus on the groom. (pictured below) So in order to be able to focus on the groom I handed him my iphone with the flashlight on and told him to close his eyes and hold it up to his face.
{Download Our Free Beginner’s Guide to OCF E-Book Here}
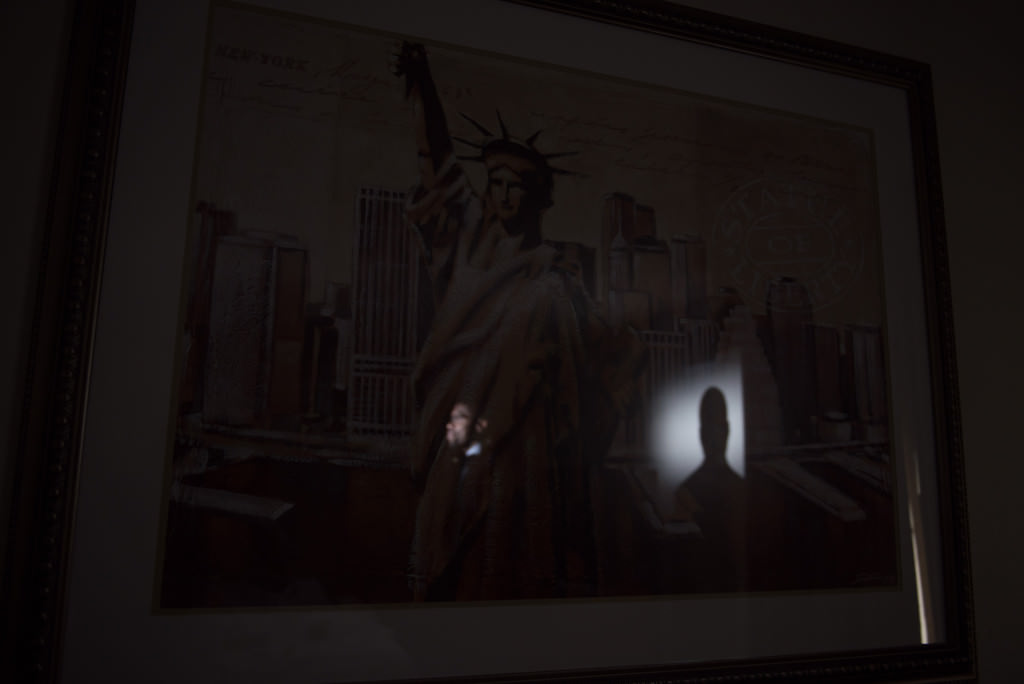
In order to be able to focus on the groom I handed him my iphone with the flashlight on and told him to close his eyes and hold it up to his face. (Pictured Below) From here I was able to work on my composition. I shot into the picture frame on an angle so I wouldn’t be in the image. Using the Magsnoot helped me to only light the grooms face. We use MagMod speedlight modifiers almost exclusively on a wedding day. If I have an image in my head I can create it in under 60 seconds with MagMod. MagMod has simplified our lighting system and allowed us to have the creative freedom that no other modifiers on the market can offer.
Below is a shot without the snoot on the flash. You can see that the whole room gets lit up which shows all of the stuff we were trying to hide.
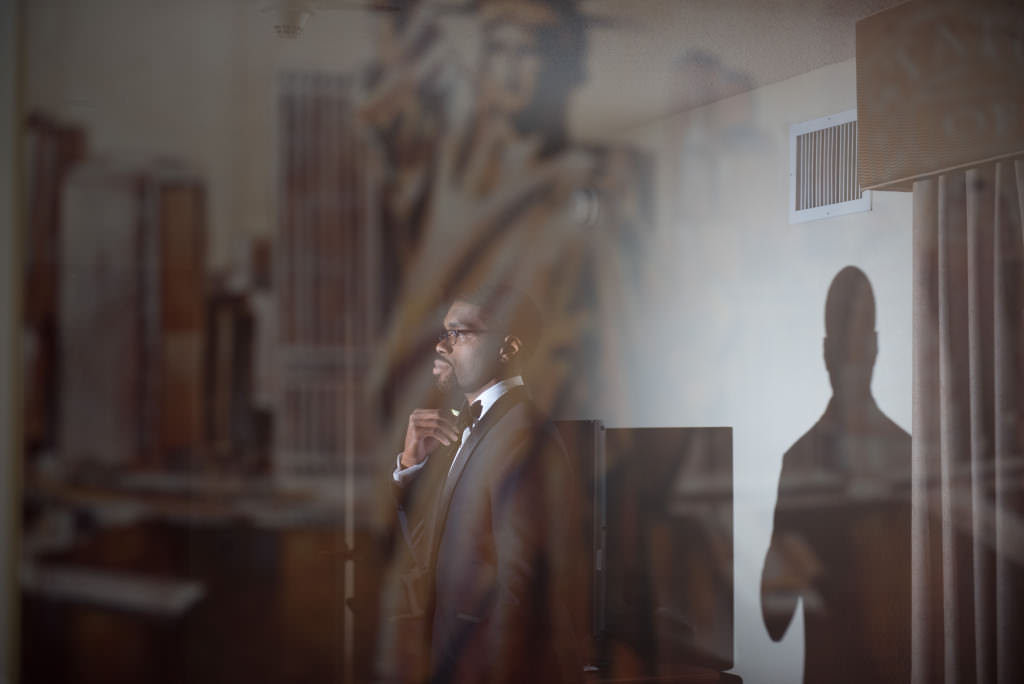
After everything was set I fine tuned the exposure. I knew I wanted to shoot around f 3.2-4.5(personal choice) so I built all the rest of my settings around that. With my camera set to f3.2 I set my shutter to 1/100th. I shoot with my flashes in manual mode so I am limited by my sync speed of 1/200th. Knowing this, I set my camera to 1/100th so I have room to let in more ambient or less without dragging my shutter to far. From there I raise my ISO until the background(in this case the painting) was underexposed by about 1 stop. Once I got my ambient settings I simply powered up my flash until my grooms face was illuminated to my liking.
Finishing Touches
There wasn’t too much that needed to be done in post for this image. I cropped the image, applied the LuRey custom preset, and did a little dodging and burning. Hope that helps you all!!
Here is a short video segment from our Walk Through a Wedding Workshop walking you through the process.
_____________________________
You can find the Justin Clamp we used to clamp the speedlight to the bed frame here. We absolutely love these!
You can find our full gear list on our page on Adorama.com
If this was helpful to you please click below to share it. It would mean the world to us!
Join our community on Facebook called The Art of the Second Shot.
Follow me on Instagram
Follow me on Twitter
Comments are closed.